This section will guide you through first time Elastic Disaster Recovery setup, including:
First time setup
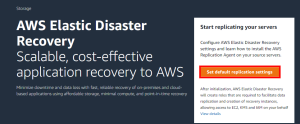
In order to use AWS Elastic Disaster Recovery (AWS DRS), you first need to set it up in each AWS Region in which you want to use it (the Region into which you will be replicating, and where you will launch Recovery instances). Setting up the service consists of defining default replication settings and creating the roles and permissions required for the service to operate.
The first setup step for AWS DRS is setting the default replication settings. Choose Set default replication settings on the AWS Elastic Disaster Recovery landing page.
You will be guided through the steps of setting up your default replication settings, default launch settings, and EC2 template. These default settings will be applied to every source server that is added to AWS Elastic Disaster Recovery. You can change both the default settings and individual source server settings for one or more source servers at any time. Learn more about editing your replication settings and launch settings.
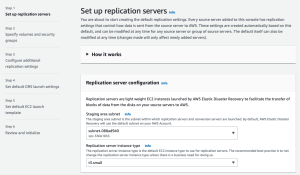
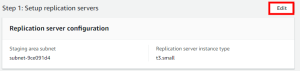
On the first page of the wizard, you will be asked to Set up replication servers. Replication servers are lightweight Amazon EC2 instances that are used to replicate data between your source servers and AWS. Replication servers are automatically launched and terminated as needed. You can start using AWS Elastic Disaster Recovery with the default replication server settings or you can configure your own settings. Learn more about replication server settings.
Configurable replication server settings include:
- The subnet within which the replication server will be launched
- Replication server instance type
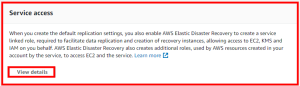
During this step you will also be able to review the service linked role and additional policies created during Elastic Disaster Recovery initialization. Choose View details to learn more.
Click Next to proceed to the second page of the wizard.
On the second page of the wizard you will be asked to Specify volumes and security groups.
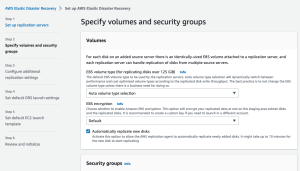
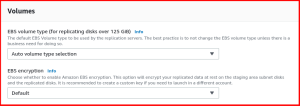
For each disk on an added source server there is an identically-sized EBS volume attached to a replication server, and each replication server can handle replication of disks from multiple source servers. Learn more about volumes.
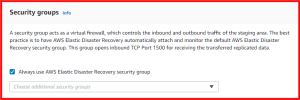
A security group acts as a virtual firewall, which controls the inbound and outbound traffic of the staging area. The best practice is to have AWS Elastic Disaster Recovery automatically attach and monitor the default AWS Elastic Disaster Recovery security group. This group opens inbound TCP Port 1500 for receiving the transferred replicated data. Learn more about security groups.
Configurable volumes and security groups settings include:
- EBS volume type
- EBS encryption
- Always use AWS Elastic Disaster Recovery security group
Click Next to proceed to the third page of the wizard.
On the third page of the wizard you will be asked to Configure additional replication settings. These include Data routing and throttling, Point in time (PIT) policy, and Tags.
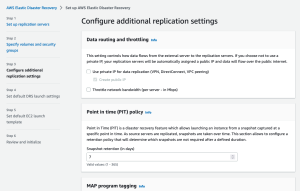
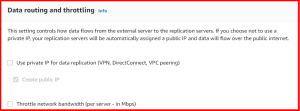
Data routing and throttling controls how data flows from the external server to the replication servers. If you choose not to use a private IP, your replication servers will be automatically assigned a public IP and data will flow over the public internet. Learn more about data routing and throttling.
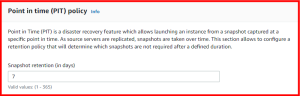
Point in Time (PIT) is a disaster recovery feature which allows launching an instance from a snapshot captured at a specific point in time. As source servers are replicated, snapshots are taken over time. The Point in time (PIT) policy section allows to configure a retention policy that will determine which snapshots are not required after a defined duration.
The Tags section allows you to add custom tags to resources created by AWS Elastic Disaster Recovery in your AWS account.

Configurable additional settings include:
- Use private IP for data replication
- Create public IP
- Throttle network bandwidth
- Snapshot retention
- Tags
Click Next to proceed to the fourth page of the wizard: Set default DRS launch settings.
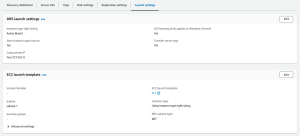
Default launch settings define how drill or recovery instances are launched in AWS. You can start using AWS Elastic Disaster Recovery with the default launch settings or configure your own. Learn more about default DRS launch settings.
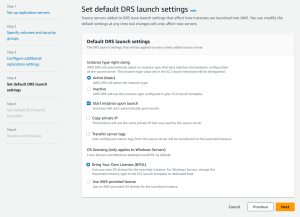
Configurable options include:
- Instance type right sizing
- Start instance upon launch
- Copy private IP
- Transfer server tags
- OS licensing
Click Next to proceed to the fifth page of the wizard: Set default EC2 launch settings. This page allows you to configure the default EC2 launch template which defines how instances are launched in AWS. Changes you make to the template will only affect new servers, but you can edit the template for multiple servers according to your preferences. Learn more about default EC2 launch template. The EC2 launch template includes basic and advanced settings.
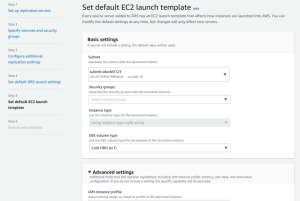
Basic configurable options include:
- Subnet
- Security groups
- Instance type
- EBS volume type
Advance configurable options only need to change in specific operational scenarios. They include:
- IAM instance profile
- Tenancy
Choose Next to proceed to the sixth and final page of the wizard, where you will be asked to Review and initialize.

Review the settings you configured. To change a specific setting, click Edit.
Once you have reviewed all of the settings you chose, click Configure and initialize.
The default template will be created and you will be redirected to the AWS Elastic Disaster Recovery console.
Adding source servers
Add source servers to AWS Elastic Disaster Recovery by installing the AWS Replication Agent (also referred to as “the Agent”) on them. The Agent can be installed on both Linux and Windows servers. Learn more about adding source servers.
Prior to adding your source servers, ensure that you meet all of the Network requirements.
DRS agents can only be installed on instances that are in AWS Regions that are supported by Elastic Disaster Recovery.
Configuring launch settings
After you have added your source servers to the AWS Elastic Disaster Recovery console, you will need to configure the launch settings for each server. The launch settings are a set of instructions that determine how a recovery instance will be launched for each source server on AWS. You must configure the launch settings prior to launching test or recovery instances. You can use the default settings or configure the settings to fit your requirements.
You can change the launch settings after a drill or recovery instance has been launched. You will need to launch a new Drill or Recovery instance for the new settings to take effect.
You can access the launch settings by clicking on the hostname of a source server on the Source servers page.

Within the individual server view, navigate to the Launch settings tab.
Here you can see your General launch settings and your EC2 launch template. Click Edit to edit your launch settings or your EC2 launch template.
Launch settings are composed of the following:
- Instance type right-sizing – The Instance type right-sizing feature allows AWS Elastic Disaster Recovery to launch a drill or recovery instance type that best matches the hardware configuration of the source server. When activated, this feature overrides the instance type selected in the EC2 launch template.
- Start instance upon launch – Choose whether you want to start your Initiate recovery job instances automatically upon launch or whether you want to start them manually through the Amazon EC2 Console.
- Copy private IP – Choose whether you want AWS Elastic Disaster Recovery to verify that the private IP used by the drill or recovery instance matches the private IP used by the source server.
- Transfer server tags – Choose whether you want AWS Elastic Disaster Recovery to transfer any user-configured custom tags from your source servers to your drill or recovery instance.
AWS Elastic Disaster Recovery automatically creates an EC2 launch template for each new source server. AWS Elastic Disaster Recovery bases the majority of the instance launch settings on this template. You can edit this template to fit your needs. Learn more about Launch settings.
Launching a drill instance
After you have added all of your source servers and configured their launch settings, you are ready to launch a drill instance. It is crucial to drill the recovery of your source servers to AWS prior to initiating a recovery in order to verify that your source servers function properly within the AWS environment.
You can drill one source server at a time, or simultaneously drill multiple source servers. For each source server, you will be informed of the success or failure of the drill. You can drill your source server as many times as you want. Each new drill first deletes any previously launched drill or recovery instance and dependent resources. Then, a new Drill instance is launched, which reflects the chosen Point-in-time state of the source server. After the drill, data replication continues as before. The new and modified data on the source server is transferred to the Staging Area Subnet and not to the Recovery instances that were launched during the test.
Note:
- Windows source servers need to have at least 2 GB of free space to successfully launch a recovery instance.
- Take into consideration that once a drill instance is launched, actual resources will be used in your AWS account and you will be billed for these resources. You can terminate the operation of launched Recovery instances once you verify that they are working properly without impact in order to data replication.
Launching a recovery instance
Once you have finalized the testing of all of your source servers, you are ready for recovery. You should perform the recovery at a set date and time. The recovery will migrate your source servers to the recovery instances on AWS.
You can recover one source server at a time, or simultaneously recover multiple source servers. For each source server, you will be informed of the success or failure of the Recovery. For each new recovery, AWS Elastic Disaster Recovery first deletes any previously launched recovery instance and dependent resources. Then, it launches a new Recovery instance which reflects the most up-to-date state of the source server. After the Recovery, data replication continues as before. The new and modified data on the source server is transferred to the Staging Area Subnet, and not to the recovery instances that were launched during the recovery.
Performing a failback
Once the disaster is over, you can perform a failback to your original source server or to any otherAWS Elastic Disaster Recovery Failback Client on the server. In order to use the Failback Client, you need to generate Elastic Disaster Recovery-specific credentials. Once the failback is complete, you can opt to either terminate, delete, or disconnect the Recovery instance.
Learn more about performing a failback.
Credit to: AWS Documentation